Linocut from a Photo: Developing an Image by Hand
How to make a linocut from a photo in six steps, and why carving and printing one feels exactly like watching a photograph appear in the darkroom tray.
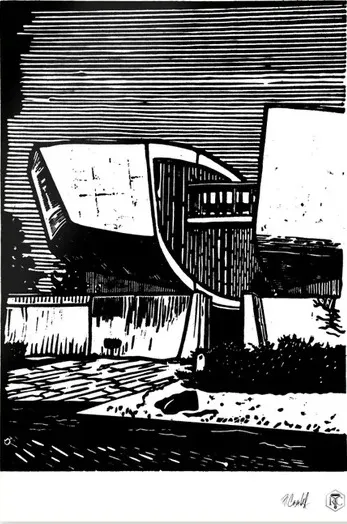
Remember the darkroom? A blank sheet sitting in the tray, and then, slowly, a picture surfacing out of nothing. That is what happens every time I peel a sheet of paper off an inked block. Making a linocut from a photo is, quite literally, developing a photograph by hand.
The difference is the timescale. No minutes in chemicals, but evenings with a knife and a piece of linoleum. And at the end, one moment that tells you whether it all worked.
Why does making a linocut feel like developing a photo?
A photograph holds thousands of shades of grey. A linocut holds exactly two: ink or paper. There is no grey.
So the first step is always a decision. What becomes black, what stays white? Every cut decides where the light will fall. Whatever I carve away stays pale. Whatever is left standing takes the ink and prints dark.
In a way I work like a photographer, only backwards and by hand. Where a photographer exposes, I carve. And just like in the darkroom, I only see the real image at the very end, when I’ve rubbed the back of the paper with the baren and lift it carefully off the block. That’s when the picture “develops” right in front of me, line by line, like a print slowly appearing in the tray.
It’s still my favourite moment of the whole process.
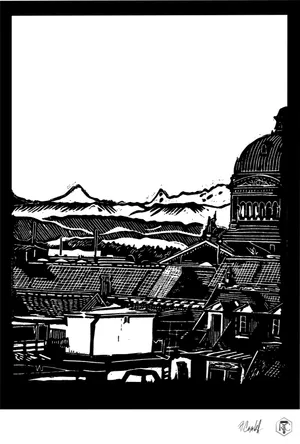
Above Bern: from a phone snap to an original
Here’s an example. Above Bern started as an ordinary photo. I was standing on the terrace of the Hotel Schweizerhof in Bern, looked out across the rooftops and took a picture.
The photo had everything in it: sky, roofs, façades, a few hundred greys. For the linocut I had to take nearly all of that away again. What remained were shapes, edges and light, which is exactly what Bern looks like from up there.
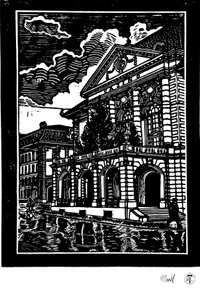
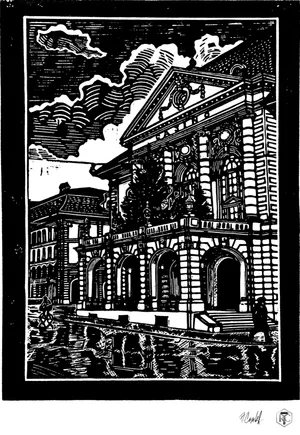
Casino Bern followed the same idea. A building everyone in town knows, reduced to black shapes and carved lines, and still you recognise it at a glance.
How to make a linocut from a photo, step by step
If you want to try it yourself, this is the process I use today:
- Pick your photo. Ideally one with clear light and strong shadows. Flat, grey light gives you flat prints.
- Simplify it to black and white. Trace the photo and decide for every area: ink or paper. Grey doesn’t exist. You’ll build mid-tones later with lines.
- Mirror it and transfer it. The design has to go onto the block reversed, otherwise the print comes out the wrong way round.
- Carve. Cut away everything that should stay white. Take your time, because a cut can’t be undone.
- Ink the block. Roll a thin, even layer of ink over the surface with a brayer.
- Print and lift. Lay the paper down, rub with the baren in small circles, then peel the sheet off slowly. Now you see what you’ve been making all along.
The knives and the baren I use for all of this are in my post on the linocut tools I actually use.
How do you transfer a photo onto lino?
I’ve tried a few ways. At first I traced the design and pressed it through with carbon copy paper. These days I transfer some drawings with a tattoo stencil printer, which is quick.
What works best, though, is the old-fashioned way: redrawing the whole thing by hand directly on the block. While I redraw, I’m already deciding where the lines will go, so my head is one step ahead when I start cutting.
Now the honest bit. More than once I’ve had a design half cut before realising I’d forgotten to mirror it. The whole print would have come out reversed. Since then I check twice before the first cut. With a cityscape, maybe not everyone would notice. I would.
How do you get shades of grey in a linocut?
If grey doesn’t exist, how do you show evening light or a cloud? With lines. The closer together they are, the darker an area reads. The further apart, the lighter it gets. Direction matters too, because it gives the image movement and form.
That’s how a print can feel full of light even though the paper only knows two states. Why I love working with parallel lines, and how they turned into my style, is the story in from lines to rays of light.
What ends up on the paper
Every sheet is rubbed by hand, one at a time, so no two prints are identical. The small variations in the ink are proof that no machine was involved.
And every time I lift the paper, there’s that darkroom moment again. A photo I once took on a terrace has become a picture made of nothing but ink and paper.
If you’d like to see how that looks in a finished piece, Above Bern is in the shop, alongside all the other originals.
Prints in this article
Questions
Can any photo be turned into a linocut?
Almost any, but photos with clear light and strong shadows work best. There is no grey in a linocut, so the image has to survive being reduced to pure black and white.
Why do you have to mirror the design?
Printing flips the image from the block onto the paper. If you don't reverse it first, the print comes out back to front, and any lettering reads backwards.
Do I need a printing press to make a linocut?
No. I don't own a press at all. Every sheet I sell is printed by hand with a bamboo baren.